Using jQuery with the BlockUI Plugin And LINQ to SQL
There are quite a few jQuery Plugin’s out on the internet, and one of the cooler ones I’ve come across lately is the BlockUI Plugin. The BlockUI Plugin lets you simulate synchronous behaviour when using AJAX, without locking the browser. When activated, it will prevent user activity with the page (or part of the page) until it is deactivated. BlockUI adds elements to the DOM to give it both the appearance and behaviour of blocking user interaction.
Before we get started, this example uses the latest version of jQuery which is 1.3.2. That can be downloaded from here. You’ll also need a copy of the Northwind database. If you don’t have a copy of the Northwind database, you can go here to download it.
The BlockUI Plugin has a couple of options that you can override to change the default behaviour and style. The options I am overriding in this example are:
- css – style for the message when blocking
- overlayCSS – style for the overlay
- message – the message to display in the overlay
- bindEvents - enable if you want key and mouse events to be disabled for content that is blocked
To make this example more life like I’m going to create a page where the user can type in a customer’s name and have it search the Northwind database and display the results all using jQuery and the BlockUI Plugin. The Plugin will give the user visual feedback immediately that their query is working.
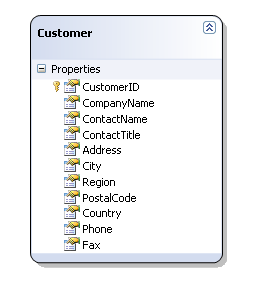
Open Visual Studio 2008 and create a new Web Application. Add a new LINQ to SQL file to the project and call it Northwind. Add the customers table to the file:
The next step is to open the Default.aspx.cs file and add the following code:
C#
[WebMethod]
public static List<Customer> FetchCustomers(string contactName)
{
var customers = new List<Customer>();
using (var dc = new NorthwindDataContext() )
{
customers = (from p in dc.Customers
where p.ContactName.StartsWith(contactName)
select p).ToList();
}
for (int i = 0; i < 1; i++)
{
Thread.Sleep(1000);
}
return customers;
}
VB.NET
Public Shared Function FetchCustomers(ByVal contactName As String) As List(Of Customer)
Dim customers = New List(Of Customer)()
Using dc = New NorthwindDataContext()
customers = ( _
From p In dc.Customers _
Where p.ContactName.StartsWith(contactName) _
Select p).ToList()
End Using
For i As Integer = 0 To 0
Thread.Sleep(1000)
Next i
Return customers
End Function
The code above will be called by jQuery. It searches the customer table for all the records that have a contact name that starts with what the user types in. For demonstration purposes I have added code in the method to mimic latency. Open the Default.aspx page and add the following jQuery code to the section of the page. Ideally JavaScript should go to a separate .js file, however for this example; I’ll keep it in the same page:
<head runat="server">
<title>jQuery BlockUI Plugin with LINQ to SQLtitle>
<script language="javascript" type="text/javascript" src="Scripts/jquery-1.3.2.js">script>
<script language="javascript" type="text/javascript" src="Scripts/jquery.blockUI.js?v2.24">script>
<script language="javascript" type="text/javascript">
$(document).ready(function() {
$('#btnFetchData').click(function() {
$.blockUI({
css: {
padding: 0,
margin: 0,
width: '30%',
top: '40%',
left: '35%',
textAlign: 'center',
color: '#000000',
border: '3px solid #aaa',
backgroundColor: '#ffffff',
cursor: 'wait'
},
// styles for the overlay
overlayCSS: {
backgroundColor: '#000',
opacity: 0.6
},
message: ' Searching the database. Please wait.',
Searching the database. Please wait.', bindEvents: true
});
$.ajax({
type: "POST",
url: "Default.aspx/FetchCustomers",
data: "{contactName:\"" + $("#txtContactName").val() + "\"}",
contentType: "application/json; charset=utf-8",
dataType: "json",
async: true,
cache: false,
success: function(msg) {
$.unblockUI();
var customers = msg.d;
if (customers.length > 0) {
$("#result").text("");
for (var i = 0; i < customers.length; i++) {
$("#result").append(customers[i].CustomerID + ", ");
$("#result").append(customers[i].CompanyName + ", ");
$("#result").append(customers[i].ContactName + ", ");
$("#result").append(customers[i].ContactTitle + ", ");
$("#result").append(customers[i].Address + ", ");
$("#result").append(customers[i].City + ", ");
$("#result").append(customers[i].Region + "
");
");
}
}
else {
// validation failed
$("#result").text("No matching records were found.");
}
},
error: function(XMLHttpRequest, textStatus, errorThrown) {
$.unblockUI();
alert(textStatus);
}
});
return false;
});
});
script>
head>
In the code above I am binding to the input button’s click event. When the user clicks the button, it will run the blockUI function immediately letting the user know their search is underway. Once the UI is blocked it will execute the FetchCustomers method. The data being returned is a generic customer list, so a check against the length property is required.
var customers = msg.d;
if (customers.length > 0)
A
element named results will contain either the customers found, or a message letting the user know there were no matching records. If you run the application and search for a customer, you’ll see the UI is blocked and a message appears whilst searching.

This functionality would also be useful for collecting data and performing server side validation on that data. This is yet another good use of jQuery.
The entire source code of this article can be downloaded over here


 DataGridView Control with Row Status Icon
